Tips for Recording your Videos

Course videos are certainly not expected to resemble slick Hollywood productions.  However, there are a few things that can be done to make sure students get the most out of your videos.

Video Length

There might be 90 minutes worth of lecture content for a particular week, but there should not be a 90-minute video.  A basic principle of online learning design is to be mindful of "cognitive load", which stresses that we all have limited working memories.  Rather than recorded versions of full-length lectures, it is recommended to segment lectures into "chunks" of shorter content.  Ideally, each video would be five to ten minutes long, allowing students to fully digest the content before moving to the next video.  Here are a few more items to consider:

  • Recommended video length: 5-10 minutes
  • Maximum video length: 20 minutes
  • For each video, start by briefly addressing the key point ("In this video, we'll discuss ----").
  • Pro Tip:  Use PowerPoint's video production features to record narrations for all slides in your presentation.  Then, you can make several copies of the full presentation, and edit each copy into a smaller chunk.

Tips for High-Quality Audio

Viewers should be able to understand the speaker clearly and effortlessly.  Background noise or distorted audio often result in strained listening, which leads to less concentration.  Choosing the right microphone will guarantee that audio comes across with clarity and balance.

Microphones built in to your device

Most laptops, tablets and smartphones have microphones integrated into their hardware. They capture sound in an omnidirectional pattern, so they pick up every little bit of background noise, like barking dogs, crying babies and your neighbor’s lawnmower. While these microphones might be acceptable for calls with family or meeting with colleagues, they aren't recommended for course videos.

External microphones

External microphones are plugged into your computer, usually through a USB port.  There are numerous types of external microphones available, all with different purposes and features.  For solo recordings, it's recommended to use a condenser mic or a lavalier mic.

  • Recommended condenser mic: Blue Yeti
  • Recommended lavalier mic: Shure MOTIV MVL

Environmental Noise

Environmental noise should always be of concern, no matter what kind of microphone is being used.  In order to decrease the chance of environmental noise in your recording, consider the following:

  • Record in a carpeted room.  Hard surfaces, such as tile, can cause excessive reverberation.
  • Turn off all appliances (dishwasher, dryer, washer, etc.) and HVAC systems.
  • Keep all pets out of the room.
  • Close all windows in the room.

Tips for High-Quality Visuals

Recordings with low-quality visuals and lighting risks being distracting for viewers. Follow the guidance below to create the most viewer-friendly visuals possible.
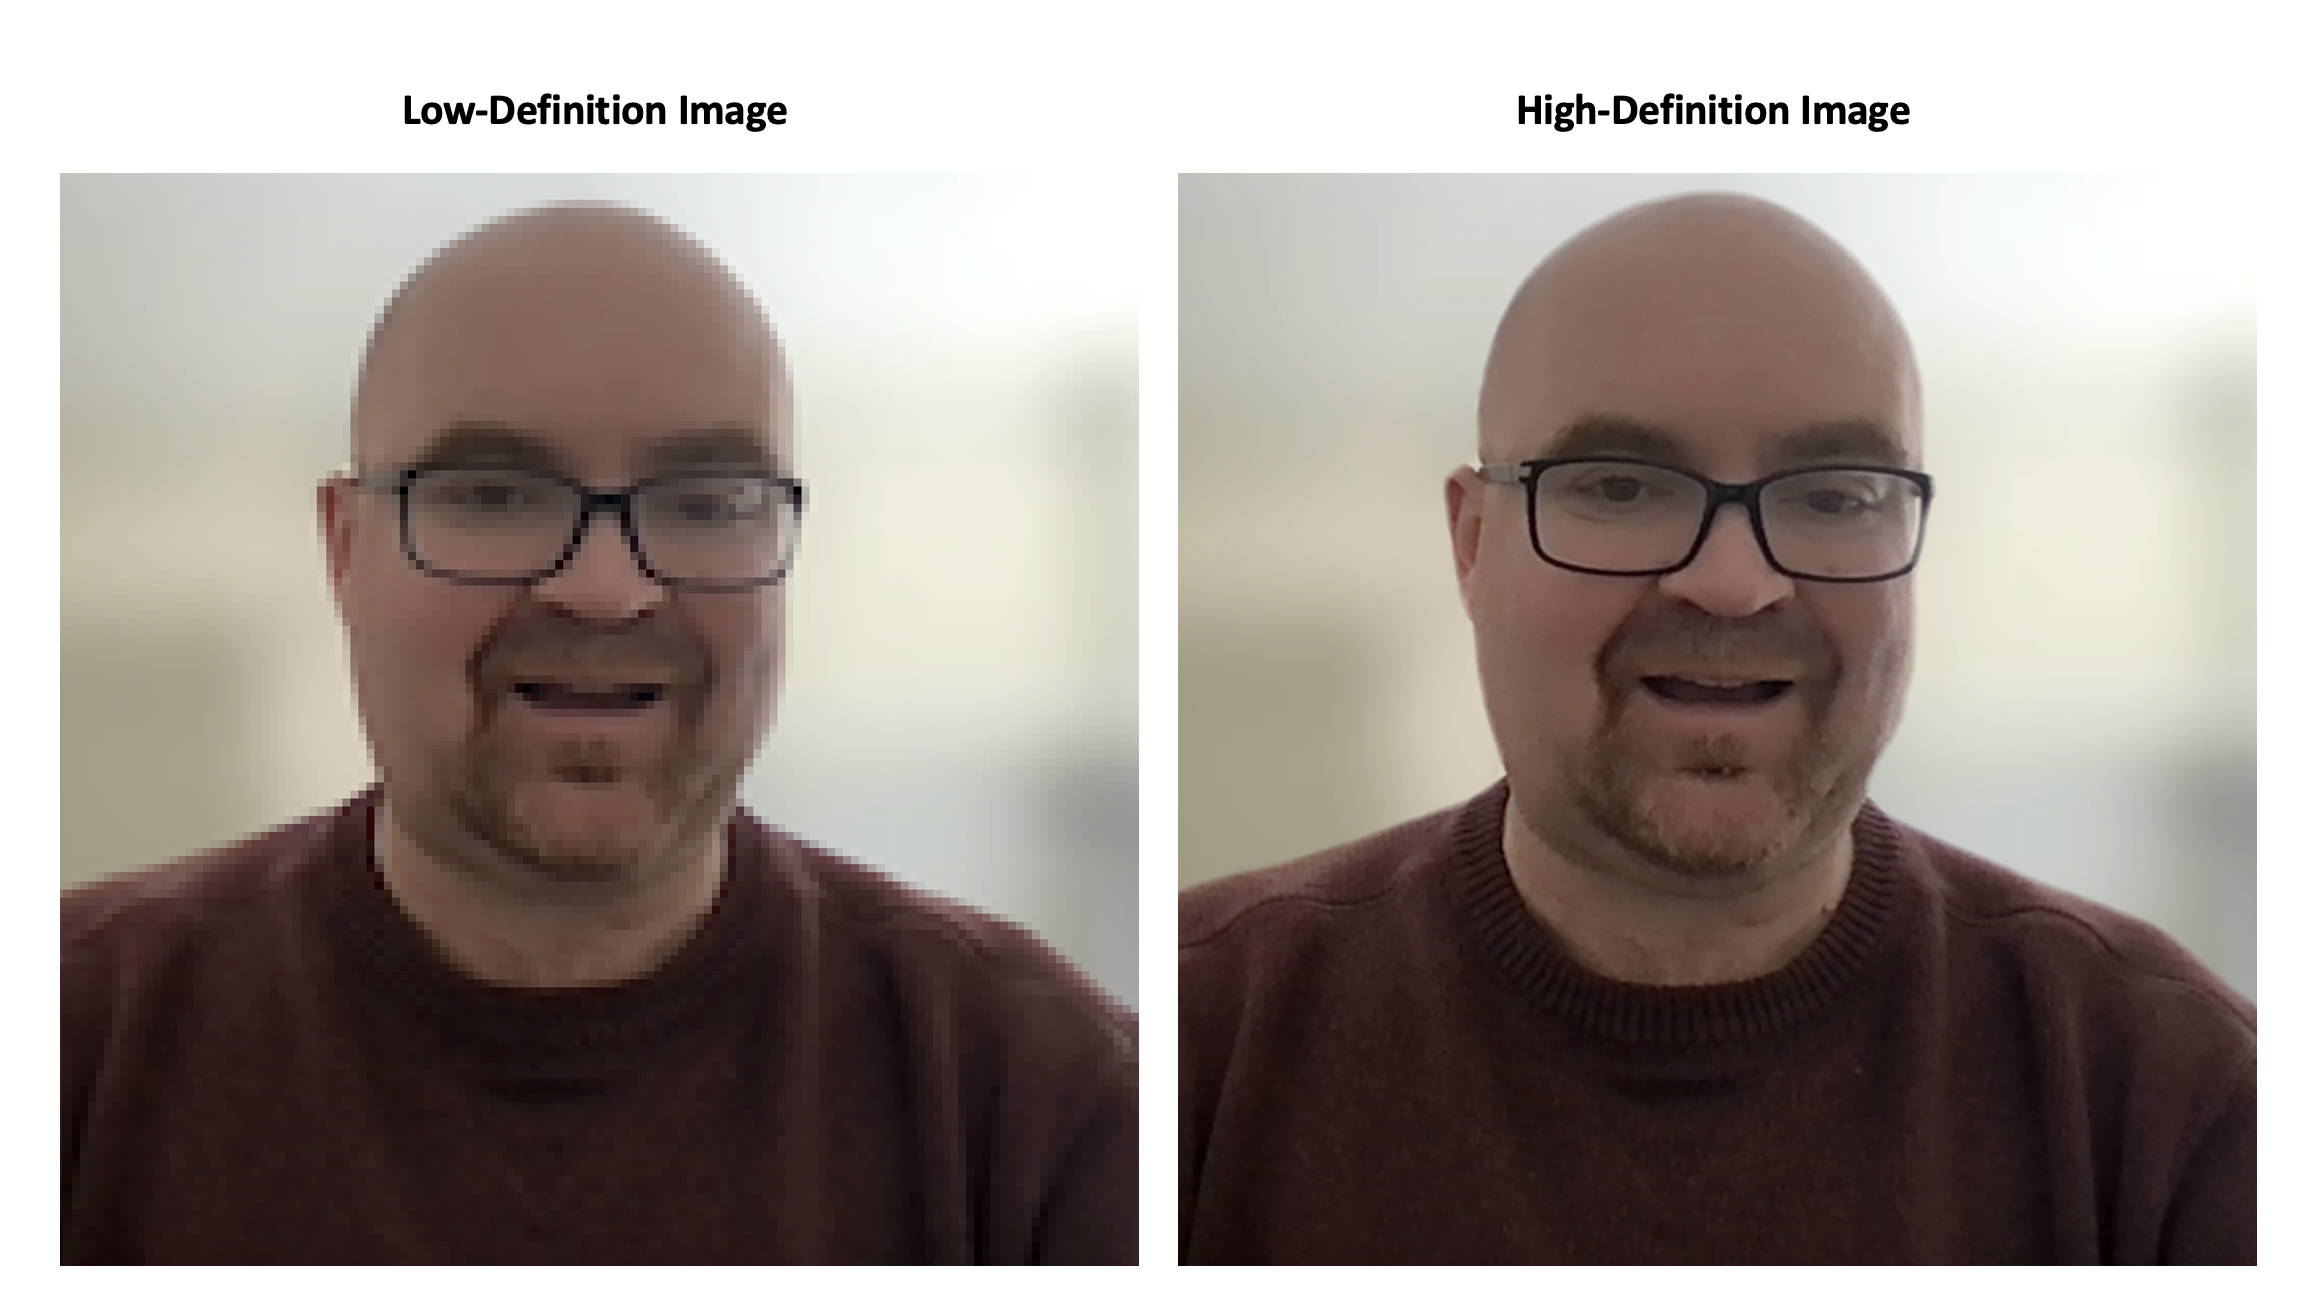
Webcams

Most recently-manufactured webcams record at high definition resolution -- at least 720p.  As such, they produce the clear and detailed images.  If your image is grainy, or lacks the clarity of a typical HD TV, consider contacting GPS for an external webcam.

Lighting

Natural light (sunlight through a window)
  • When using natural light, place the camera (or computer) facing opposite the window.  The subject should be facing the window.  If this is reversed, the subject will be dark and shadowy.
Incandescent light (light bulbs)
  • When using incandescent light, close all blinds.  Natural light and incandescent light should not be mixed.  Because overhead lighting typically lights everything in a room evenly, it is generally a good option.  However, avoid having the lightbulb in the shot.  If there are lamps situated around the room, experiment with the best angles and placement in order to find the best option.

Video: Examples of Lighting
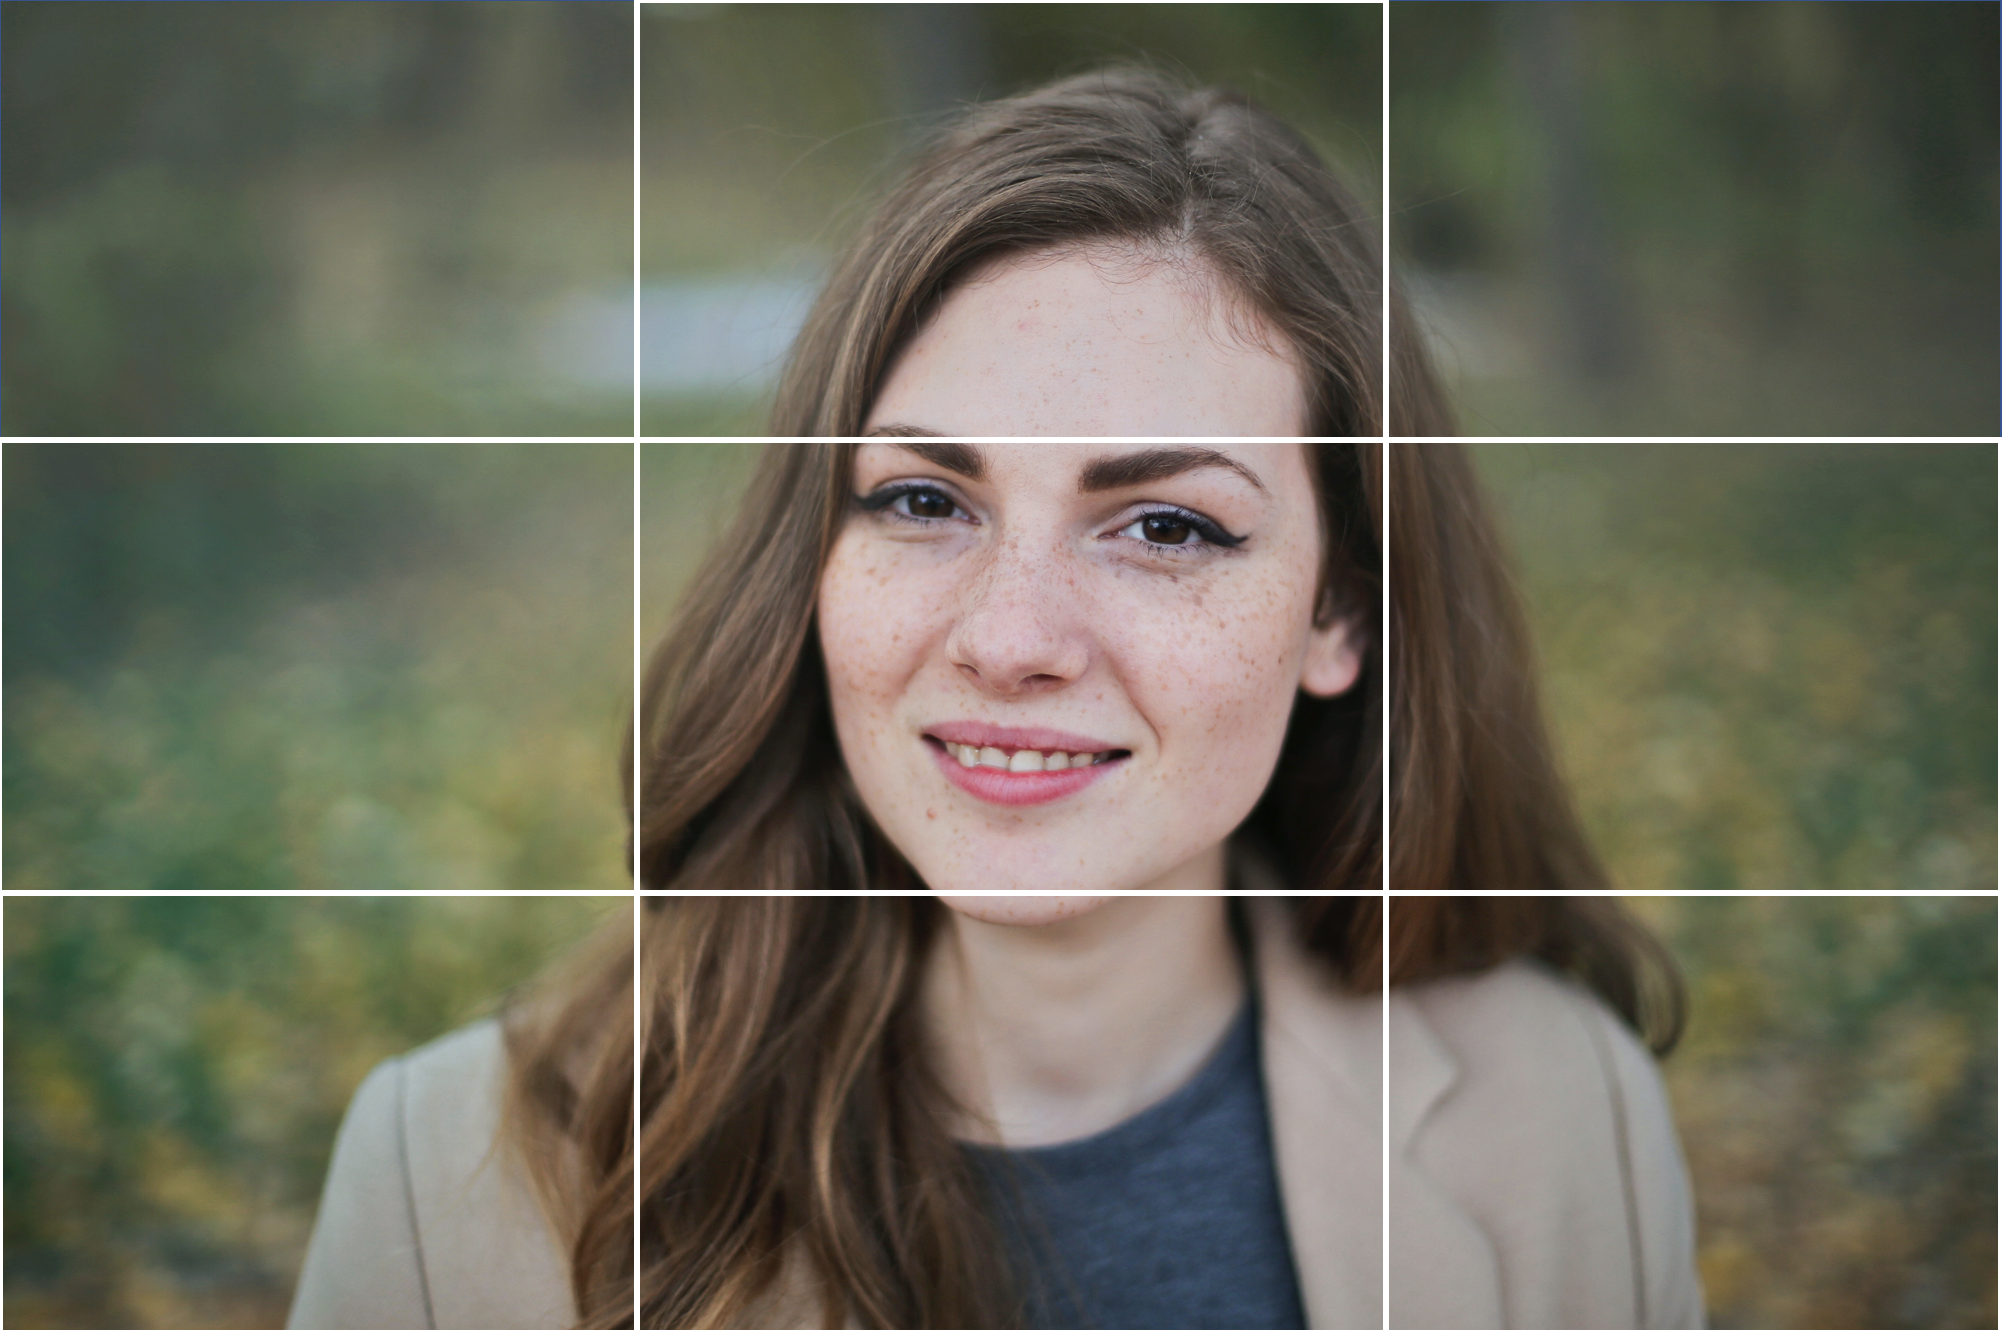
Framing 

Cinematographers and photographers often divide their frame into a 3x3 grid, which allows them to better organize the composition of their shot. Because you will be the only subject of the recording, it's recommended to have your image between the middle third and upper third of the grid, which is where the viewer's attention naturally goes.  See the image below for an example.