Design Accessible Content with Canvas's Rich Content Editor
Canvas's Rich Content Editor is available throughout the platform, and has the basic functionality needed to create accessible pages for your students.
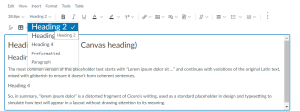
- Use the built-in Headings to organize and structure your content - Similar to Word, Canvas's headings feature structures your content. The image below illustrates the drop-down menu where you can select your heading style. Note that Canvas's headings begin with Heading 2.
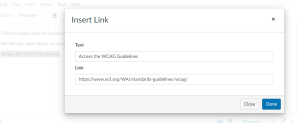
- Create descriptive links and open external links in a new window - The text of your links should tell your students where they are going. In the screenshot below, the "Text to display" field is where you should add descriptive text for users.
- Wrong - Click here to access the WCAG guidelines
- Wrong - access the WCAG Guidelines here: https://www.w3.org/WAI/standards-guidelines/wcag/
- Correct - access the WCAG Guidelines to learn more about designing accessible web pages.
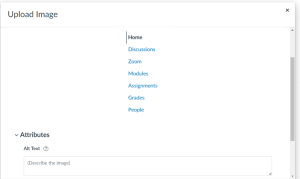
- Add ALT tags to all of your images and non-text items - You can add images to Canvas pages by clicking on the images icon (
 )and then "Upload Image". When you add the image, you have the option right there to add the Alt-text description. Below the image you'll see the Attributes settings where you can add the description.
- Alternatively, use Canvas's built-in Accessibility Checker - it's a great tool for identifying images that need ALT tags.
- Add descriptions to complex charts, graphs and visuals - If an image requires a longer description than is appropriate for an ALT tag, then you can add a caption beneath the image that explains the visual to someone who has a visual impairment.